Showing posts with label DIY tuesday. Show all posts

Sunday, September 12, 2010

DIY Tuesday: Revamped Pumps

Sorry, was too busy creating new designs for an upcoming openshoot ^_^;

Week 2: Revamped Pumps!

Purchased this pair of pumps at a local thriftstore for Php50.00. It was originally marked at Php450.00 but the store is closing down so they had all items marked down. Will post photos of hoard soon ^_^;

The color is grayish lavender with metal trim and the most amazing embossed sole. The only ugly thing about these shoes are the metallic bows on the back. It must have been pretty but when I thrifted it, the bow was badly deformed and cheaplooking. When I tried hacking it off, the back part of the shoe where it was attached ripped a bit (the bows were glud, then sewn on) so I had no choice but to reattach something at the back to hide the rips. I decided to embellish it with dainty bows (the original ones were huge o_O) to give that sort of '50s vibe. Just like the types of shoes Summer Finn wore *_* (~droolz~)

Here's the step by step process for creating a new look with old shoes ^_~

What you need:


Old pumps/sandals/wedges/what have yous
Rags
Grosgrain ribbon ( I used a pale yellow in colour)
Needle (not necessarily an upholstery one but a medium sized one)
Thread (mine's gold)
Pins


Let's Start!

1. Clean you shoes with a damp cloth/rag. Make sure you thoroughly clean it. I even sprayed alcohol on the shoes' insides and relined them with pads.


2. Cut off around 6 inches of your ribbon/trim. If you don't have a ruler, just cut off the approximate length of a 20 peso bill.


3. Fold the ribbon into a double loop. Then pin them in place ^_^;


4. Stitch the bow in place and cover the center with an inch of ribbon.


5. Position the bow at the upper back portion of your shoes and stitch in place.


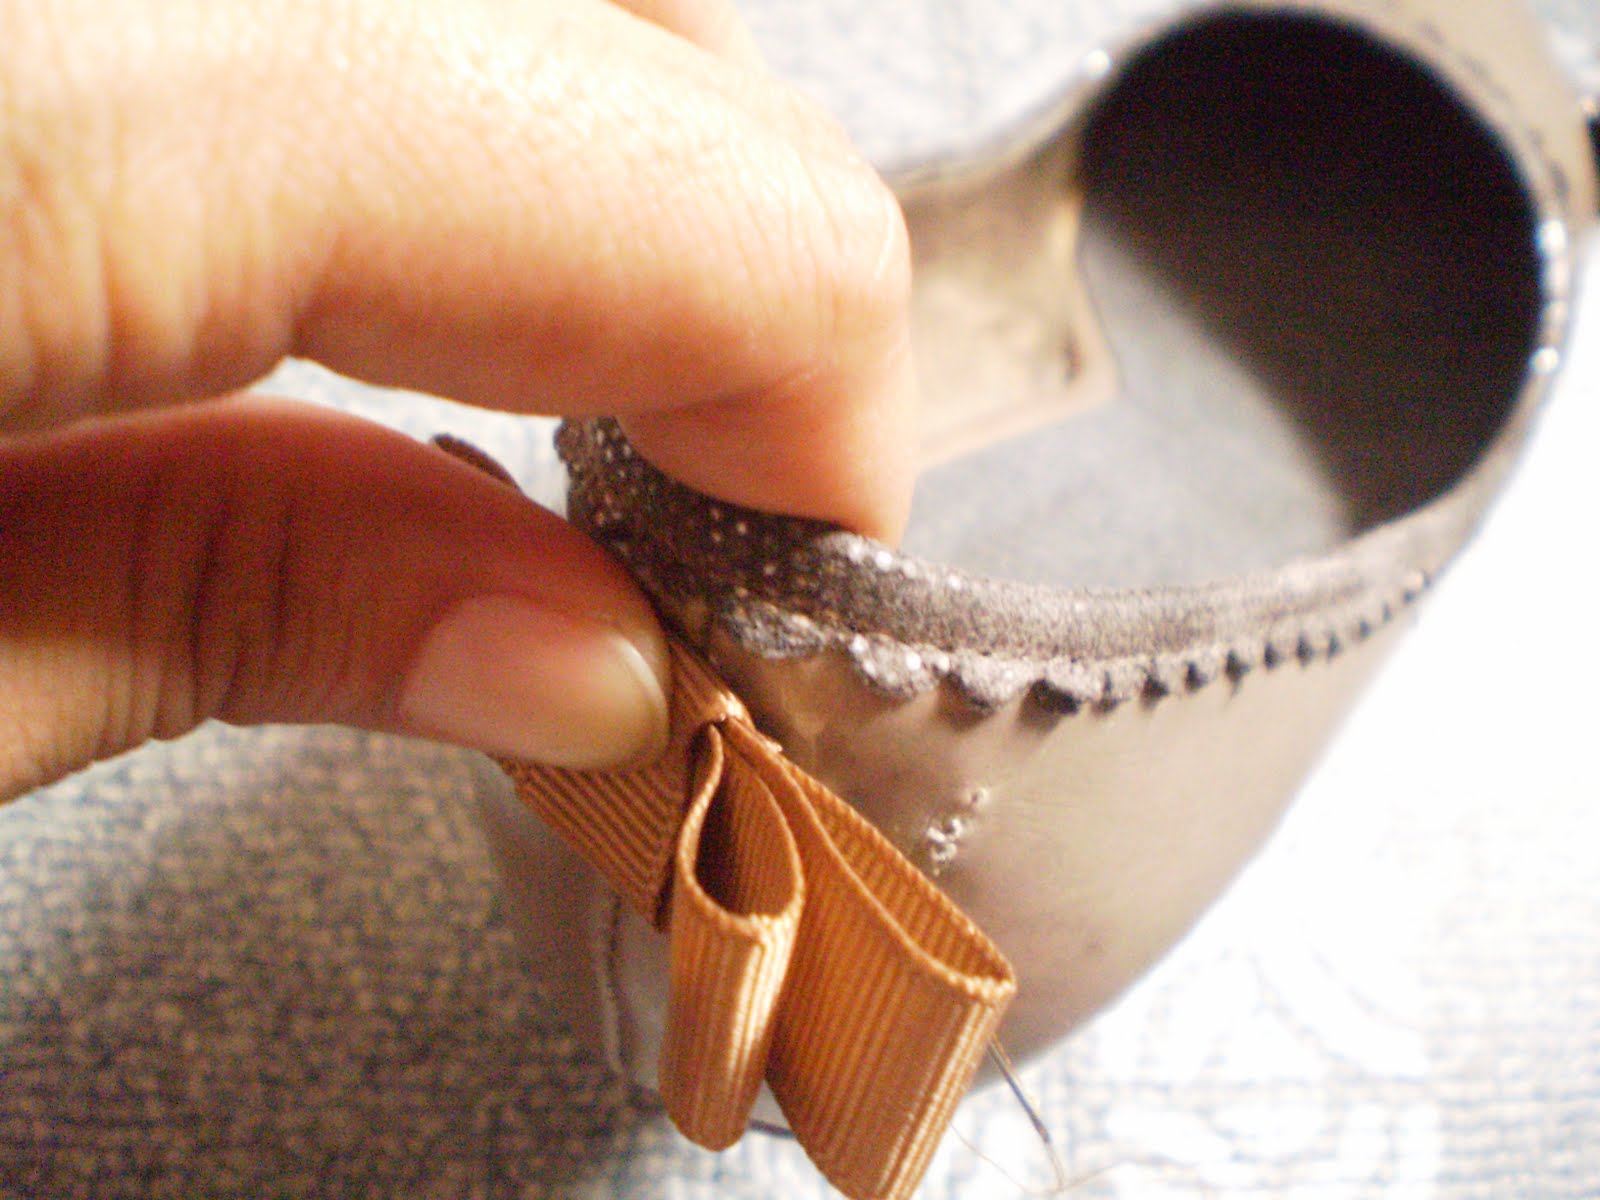
Voila! New shoes for less. It costs me just Php50 for this project since I already have the other supplies and took just about 15 minutes of my time :)


Monday, August 23, 2010

DIY Tuesday: Handmade Clothing Tags

I'm trying to come up with weekly reads on my blog. Since my work week technically starts on Tuesdays, I'll post a new tutorial for you every Tuesday of the week.


Week 1: Handmade Clothing Tags!

I came up with the idea of doing my own clothing tags after checking out local suppliers of professionally-made woven/ printed tags. The minimum order was around 5,000 pieces! Can you imagine?! That's 5000 x .80 per piece = a whopping 4k that I am NOT willing to take part! Plus, if I produce exactly 14 pieces of clothing per week on my first few months, that's like 56 labels a month totaling to 72 months worth of clothing tags. That's too much for a start up, indie label like mine.

SO, I thought of creating my own tags inspired by those tutorials at Jap mags like Cotton Friend and Threadbanger. Not only are they economical and ecofriendly, they also create a touch of whimsy and adds more to that handmade feel our label projects.


What you need:

Small bottle of non toxic Fabric Paint (mine's brown and bought from NBS for around Php50)

A small sponge roller (nice and easy application! I used my Prang brush and I totally wrecked it :( )

Stamp (I had mine handcrafted from my logo by a local corner artisan for just Php100)

A small, reusable container (don't worry, it's easy to scrub off with an old toothbrush once it dries off just don't use the ones for food.

Fabric (make sure that it absorbs the paint really well. I'll show you how to seal the paint later. I've done around 50 pieces in unbleached cheesecloth or katsa for hangtags and another 50 in a nice roll of 1 inch champagne coloured satin ribbon for the labels)

Old newspapers for lining your work area.

A couple of old magazines to place under your fabric to work as 'a stamping pad.'


Let's start!

1. Start off by pouring paint to your plastic container (make sure you've lined your work area with old newspapers). Fabric paint tends to dry up pretty fast so make sure you pour just enough paint (around a tablespoon) and keep the cap tightly closed. Brush the stamp's face with paint. Make sure you apply it in clean, even strokes. Avoid glops to make sure the image stays nice and crisp.


2. Position the stamp to the fabric of your choice (this one is the cheesecloth version). Press it firmly on top of the stamping pad (oops, not shown here) and count to 5 before lifting the stamp off.

3. Keep on stamping but make sure you leave enough space around it for allowance.


4. Heat seal the fabric paint by pressing it for about a minute or two. I don't use this ceramic straightener for my hair since I'm too lazy for that so I use it for pressing seams and hems, and in this case, heat sealing the fabric :) Leave it to hang dry for a couple of days to let the fabric absorb the paint real well before handwashing it.


Here's the final product (will post soon of tags sewn on my clothes :P )